Monday 25 October 2021

Mother Nature By Kerrie Barnes

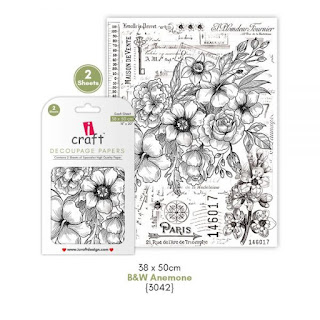
 Hi Everyone and welcome back to the iCraft Blog.  Today I am sharing my version of Mother Nature, which I created on a large round canvas.  I wanted to focus most of this project on the gorgeous chalk paints by iCraft.  I started by priming the canvas with iCraft Heavy Gesso White.  The canvas was already primed, but I decided to prime it again.  I cut a large section of iCraft 3042 Decoupage paper and adhered it to the canvas using iCraft Decoupage Glue.  Then I sketched a face from the nose down, below the paper.


I waited for everything to dry properly and began painting the face, paying particular attention to the nose and lips.  Then I painted the decoupage paper.  I gave everything a coat or two of matte spray varnish, in preparation for the next step.


Using the metallic insta transfer sheet number 7004, I followed the directions on the back of the packet and adhered leaves and gold accents to the desired areas.  I used the matte varnish to seal the paint so water would not affect what I'd painted.


I chose a heap of flowers in contrasting colours and stuck them onto Mother Nature's headdress, then added wooden embellishment 3042 after painting them with iCraft Midnight Coffee and Aged Bronze Metallic Wax.


I dabbed the flowers lightly with iCraft Metallic Gold Rush Chalk Paint, and the background with iCraft St. James Street and Coconut Milk.  Once again I let everything dry and then gave the entire project a couple of coats of matte spray varnish.  oila!  Finished.  This was a big time consuming project, but also a lot of fun.


For all your iCraft needs visit Tina Ollett at tinamarie.com.au.  Thanks for stopping by and please take a look at all the other wonderful iCraft projects from our talented Design Team.  Thanks.  Kerrie.  xx


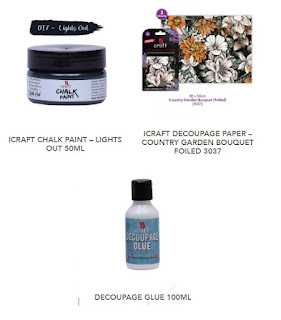
Products used are listed below.


Old Glory


Mulberry Roses Shaded Yellow


WE 350


Friday 22 October 2021

Bloom De Fleur by Rosalie Duke-Stanley


The Bloom De Fleur is a gorgeous paper range that you can fussy cut the bright flowers and team with a variety of background pages from the collection. To add interest, I used cogs that are normally on grungy or masculine pages however thought that they were perfect for pretty pages as well. 

I selected two different pattern papers - stripes and dots - to add contrast for the background. Fussy cut a range of flowers. Paint the cogs in Chalk Paint - Coconut Milk. You may need to paint the cogs twice to cover them completely. The word was painted in Roman Purple as a nod to the purple wisteria flowers featured under the photo. 

To put together, place the photo (matted on a piece of iCraft wooden embellishment that was from a frame used in a recent creation) to the right of the layout. Remember to leave room for flowers and cogs between the photo and edge of the page. Place the flowers across the page to cover up the join between the background papers. Make sure to add a few flowers up one side so that it adds interest and doesn't end up being a straight line and a few under the photo. Once in placed, glue down and raise up the top flowers with foam to add depth. 


Slide the cogs under the flowers. I cut some in half to add more around the flowers. The aim is to have them just visible. To finish off, use a paint brush and flick chalk paint - coconut milk on the striped background and add fine pieces of gauze underneath some of the flowers. 


I hope you enjoy my layout and good luck with your own creations. 

For more information and products, click on the featured products below or the link to the iCraft Australia products. 

https://tinamarie.com.au


Monday 18 October 2021

Up-cycled Summer BBQ Caddy - By Deb Stephens

Front View - BBQ Caddy

 This caddy was made from all recycled materials from a stall holder at my local markets. As soon as I saw it, I knew what it would be. My last BBQ caddy had just died and I thought this would make a fantastic upgrade, just in time for our Australian Summer and BBQ season.

Original Caddy - Made from all recycled materials

And I really didn’t need a lot of product to finish this. I first sealed the wood with a wood sealer as it was quite rough and I knew it would absorb a LOT of paint if I didn’t. I then painted it all over with iCraft Chalk paint in Lights Out (such a gorgeous colour!) I then measured out the panels I wanted to cover and added a few centimeters on each side and measured and cut them out of the beautiful Foiled Country Garden Decoupage paper. I then added iCraft Decoupage glue to the panels (one panel at a time) and then placed the paper on top. I used an old bank card to smooth out any air bubbles, starting from the middle and moving outwards till all creases are eased out and excess glue comes out from the sides. I wiped off the excess glue with a baby wipe. 


Inside View of BBQ Caddy
 
Back View of BBQ Caddy

Once the panels were dry, I used a fine grit sandpaper to lightly run over the edges so that it makes removing the excess paper so much easier. If I took off some paint, I just touched it up again later. I then finished the caddy off with two coats of furniture grade waterproof sealer. 

I hope you enjoyed this simple project and look forward to seeing you all next month!


Tuesday 12 October 2021

Every Picture Tells A Story by Kerrie Barnes

 Hi everyone and welcome once again to the iCraft Australia Blog.  Today I'm sharing a simple scrapbook page I made using The Rose World Collection from iCraft.  I absolutely love this new feminine range.  First I decided which papers to use from the pack, then tore sections and layered them together with corrugated cardboard from an old box. I found a gorgeous photo of galah's in my photo stash and layered it with some more corrugated cardboard and tags cut from The Rose World Collection.


I fussy cut some roses from the paper pack and slid those between various layers, then decided to ink the edges of my paper with black ink to make the page pop.  I painted various wooden embellishments with iCraft Heavy Gesso Black, and then with iCraft  metallic Charcoal Black, and glued them around the photo.


Choosing two different colours of iCraft mulberry flowers, I added them to a cluster with fussy cuts and other flowers from my stash.  I then used iCraft Heavy Gesso White, and painted a base coat on some iCraft leaf embellishments before painting them with iCraft Palm Tree and Summer Fern Chalk Paints.


I added muslin, iCraft Arty Balls and splashes of watered down iCraft Heavy Gesso White.  Using a sentiment from the new range of iCraft Flimsy Sheets, I added a title to the top and bottom of my page.  This was a really simple project, but I had a lot of fun and I got to play with some new iCraft products.


Thank you for visiting the blog and reading about my new project.  Everything I used is available at tinamarie.com.au.  Thank you xx.  Kerrie


i566


Mulberry Fillers Baby Pink

Mulberry Fillers Purple

iCraft Romantic Pink Wax


iCraft Mulberry Flowers Shaded Pink

iCraft Mulberry Roses Pink


iCraft The Rose World Paper Collection

i343

i339