Friday 31 December 2021

Happy Memories - Michelle van Oudtshoorn

Hello!

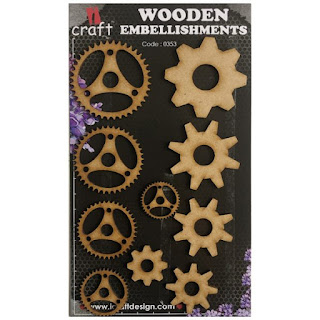
Here today to show you an off the page creation using iCraft Chipping (#10014). These are great little pieces to use, that come blank and you can create whatever you fancy. 

I started with the base of the tag, which I painted with iCraft Charcoal Metallic Chalk Paint around the edges. There are a number of wonderful iCraft decoupage papers (great for junk journals and collages too, as they are lightweight) - I used parts of the Decoupage paper #3041 to cover my tag pieces - being the inner piece and the outer frame. I attached the inner piece to the blank tag and added the frame with thick foam tape. I used iCraft Antique Bronze Metallic paint watered down to go around the edges and over parts of the paper.

Using the same Antique Bronze paint, I painted both wooden embellishments - the flourish and the arrow. I added the flourish to the top left corner of the tag and then added flowers to this. From the acetate sheet (flimsy sheet #06), I fussy cut the flowers, leaves and the bumble bee to add to the flower cluster.

I have done the same for the cluster at the bottom of the tag - adding the wooden arrow and fussy cut flowers and leaves
I finished off adding some pearls and tying a bow at the top of the tag.

Wishing you all a healthy, safe and prosperous 2022!

Take care,
Michelle


These are the products I have used: (click on the highlighted links in the text above which will go straight to the products on the website):


Friday 24 December 2021

Jaxon By Kerrie Barnes

 Merry Christmas and welcome again to my portion of the iCraft Australia Blog.  I've created a layout using the very beautiful Toddler Story Paper Collection from iCraft.  I began by choosing a number of papers from the pack, then cutting them in random sizes and distressing all the edges.  Using black ink, I edged all the pieces of paper that I cut.


I used various dies and cut tags and edges, then layered all of my pieces of paper, inserting cardboard underneath random pieces to create a 3D effect.


 Using the Toddler's Story Elements Sheets, I cut various pieces out and inked the edges of them all with black ink.  The photo of my gorgeous nephew was mounted on cardboard, then paper from the collection pack, then more cardboard under that.  


Once again, everything was layered and glued onto the project.  The elements I cut before were then glued onto the project using layered cardboard and tacky glue.


I die cut my nephew's name, inked the edges in black, then glued it to the bottom of the project.


Thank you for stopping by and until next time, stay safe and well.  Kerrie xx.

All iCraft products used, can be found at tinamarie.com.au.

The Toddler's Story Elements Pack

The Toddler's Story 12 x 12 Paper Collection Pack


After layering the first pieces


Tuesday 21 December 2021

Beautiful by Michelle van Oudtshoorn

Hello lovelies

I am so excited to share my first iCraft Australia layout with you, thank you Tina for the opportunity to create for you. Here is my first project complete using The Rose World Collection.

I used papers from The Rose Collection paper pad, cut smaller and distressed adding to a piece of black cardstock. I painted the wooden fence and the wooden title "Beautiful" with Radical Raspberry Chalk Paint, and the brushed over these very lightly with some Metallic Wax Gold Rush. I then stamped these with a script stamp using archival black ink.

Using both sets of Rose World Elements sheets, I fussy cut various roses, flowers and leaves.

I first placed my wooden gates on the page and then added the photo, before layering the flowers and adding the leaves around the photo. I have used foam tape in places to lift the flowers and leaves to create dimension.

Once I had layered all the leaves and the flowers, I added the title and hand drew some balck lines on the outside of the page.

These are the products I have used:


Thanks for popping over to the blog to visit.

Cheers,
Michelle


Saturday 18 December 2021

Little Moments- by Deb Stephens

 This layout is a simple project using a a few iCraft products for a quick result.


Start by die cutting some alphabet and stars with a selection from  'The Toddler's Story" 8x8 paper pad.

Fussy cut a few elements from one of the sheets as well. Ink the edges of all these pieces. 


Mix some iCraft 3D texture shaping gel with some Antique Photograph c

halk paint and apply through the iCraft woodgrain stencil onto some smooth white cardstock as shown.


Mat the photograph onto some of the patterned paper and then onto Kraft cardstock  and then ink the edges. Glue down the die cuts, making sure some overlap, then glue down the photo mat. Cut the Wooden Embellishment sentiment to separate the words and then apply white gesso to it. Once dried, apply Old Glory chalk paint and dry. Adhere to the layout with glue and then finish with some glossy media.

I hope this inspired you to get out those baby photos and scrap!


See the full list of products used on this project below:


Tuesday 14 December 2021

Beauty by Kerrie Barnes

 Hello and Merry Christmas.  Welcome back to my section of the iCraft Australia Blog.  Today I am sharing a layout created with iCraft's beautiful Majestic Blooms Paper Collection.  I began by selecting two of the same pieces of iCraft paper, then I cut one of those pieces to the size and shape I wanted.  


Next, I cut out the large pink blooms from the second piece of paper, embossed them, then layered them over the top using double sided foam tape.  I decided to ink the edges of the paper and flowers with dark brown ink to make everything appear vintage.


I cut out the birds from the second piece of paper, embossed them, then attached them with double sided foam tape, after inking the edges with brown ink.


I took a selection of iCraft cogs and painted them with Stewart House Brown, and Midnight Coffee Chalk Paints, before adding iCraft Metallic Waxes in Romantic Pink and Antique Bronze.  Placing my paper onto a backing board, I situated the cogs, and stuck everything down with double sided foam tape or glue.


My photo was layered with pieces of leftover paper, which I inked with dark brown ink.  I placed the photo over an iCraft wooden embellishment after painting it the same as the cogs.  I stuck the photo down using double sided foam tape and added extra cogs to the top right corner.  I added Romantic Pink Metallic Wax to a title from my stash, and glued it to my photo.  Thanks very much for taking a look at my project.  Until next time, stay safe and well.  Kerrie xx.

For the products I used, please visit tinamarie.com.au.


i103


i360


i365


i353


i206