Sunday 28 November 2021

"Beautiful Moment" by Tina Ollett

 Hi there and welcome back to the iCraft Australia blog. Tina here with you today to share my latest layout created using some of iCraft's beautiful new release products. 

My layout is titled "Beautiful Moment". 


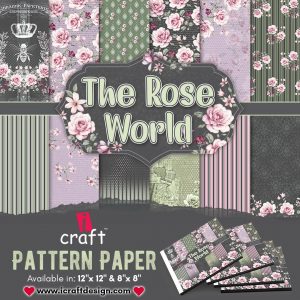
 I decided to create my layout using the gorgeous Rose World collection pack of 12 x 12 papers and the co-ordinating Rose World element sheet.  This entire collection is more than stunning, so choosing a paper to use was a little difficult. So I chose the first piece from the pack which has the most amazing details on it. And it is for this reason that I didn't add any extra to my background paper.


My background paper was primed with clear gesso and then I got started on layering the photo using other paper from the gorgeous pack. I made some layers using  a polkadot piece of paper a few times and distressed the edges of each and adhered them altogether. 
From here I coloured the Wooden Embellishment gates using white gesso, and sleigh bells chalk paint. Once the paint was dried I sanded over the top to revel some of the wood below. 
These gates were then cut to go either side of the photo. Then from here I started adding in layers of the ready cut elements. 


This is the Rose World Element Sheet required to complete this project. 


I also used some of the flimsy sheets from the number 6 pack. These were fussy cut and some were left flat and other were heated over a naked flame and moulded to shape and sit more dimensionally on the layout. These really are so much fun. Something new and different and something more to add to a page. I also used the title words for my project from the Flimsy Sheet number 8 pack. I simply used clear drying glue to stick these down to the layout. 


I used some heavy white gesso to make splatters over the top of my layout to help some of the areas of my project to pop a little more. The white gesso was also used to prime all of my wooden embellishments. Some of the wooden embellishments I used were the 5 point pendant Wooden Embellishment #157. This was primed with white gesso, and then coloured with iCraft Metallic Moon White chalk Paint. I added a few cabichons to each large drop. The backs of these were coloured with the Charcoal Black Metallic Chalk Paint. 


Charcoal Black Metallic Chalk Paint 50ml

Chalk Paint Sleigh Bells 

Well that is all from me today. I hope you have enjoyed my project and found my information useful. Stay tuned for more beautiful inspiration from the Design Team coming your way very soon. 

hugs Teen x


Thursday 25 November 2021

Altered Paint Palette by Kerrie Barnes

Welcome to the iCraft Blog.  Today I am sharing my altered paint palette.  I started by covering the palette with muslin and iCraft Heavy Gesso Black.  Then, I applied texture paste over two iCraft stencils, waited until dry and coated everything again with more heavy gesso black.


I took a small canvas and covered it with iCraft Insta Transfer 5048, then set it aside to dry.  After layering cogs, flowers and other iCraft embellishments, I coated again with heavy gesso black.  (lots of gesso on this project)

I glued the canvas to the palette, added more cogs and two paintbrushes, before adding iCraft waxes to the entire surface, as well as the side and edges of the canvas.


I added more flowers and fillers, then decided to go over some of the stenciled elements again and highlight them with more wax.


I painted three glass domes with heavy gesso black, then used iCraft Metallic Waxes in Gold Rush, Antique Bronze and Billow, and added them to the palette to look like drops of paint.


Thank you so much for taking a look at my project.  Until next time, stay safe and happy crafting.  Kerrie xx.


For products used, please visit Tina Ollet at tinamarie.com.au.


iCraft Wooden Sentiments


i353


i363


iCraft Stencil 8605


Mulberry Fillers Cream


iCraft Stencil 8926

i047

Mulberry Fillers Yellow/White


Monday 22 November 2021

Shady Fold Album - Rosalie Duke-Stanley


The ready to go album templates are perfect for embellishing and decorating to create lovely small photo albums. They come in black or brown templates and easy to paint or cover with patterned paper. This album holds up to 25 photos and other memorabilia that can be kept in the pockets. 

I used the brown template and County Garden paper range to decorate. Select 4 different pattern papers x 2 each. I also used one of the patterned papers that was suitable for fussy cutting a range of flowers and petals. 

Start by measuring up all of the pieces. I found it easier to use a corner rounder punch for the curved edges. 

Wooden embellishments - I painted the filmstrip and uneven pavers in off white chalk paint - coconut milk. You may need 2 coats. 

Adhere all of the main pieces to form the folding album and photo mats, leaving the front and back cover aside. It is easier to decorate them first before sticking them to the album 

Front and Back Covers - start by layering the flowers and wooden pieces and a slight different front and back. Remember to leave room for the flip closing tab. Layer some petals around the layout and finish off by flicking some chalk paint over the top. 

Stick all of the remaining pieces into the album. I used a dark brown ink (pinecone) and coloured all of the exposed edges covering the template. It also adds a rustic look. 

 
Back Cover 


Add photos and other special items in the pockets and photo flaps. Tip - I cut up a flexible fridge magnet and stuck it to the front cover and tab to close the album. 

Below are some of the pages in the album. 


My tips for creating the album together can be used for all of the iCraft range of albums. 

For more information and products, see featured products below or the link to the iCraft Australia products. 

https://tinamarie.com.au


Sunday 21 November 2021

Art Journal Page- Yourself by Deb Stephens


This Art Journal Page was done in my blue Dina. W journal so it is on thick cotton paper. Start with a coat of iCraft white gesso and dry. With a broad paint brush apply various shades of green iCraft chalk paint around the page so there is no white left. I then used a sponge and the Large 12x12 iCraft Layering stencil 18813 along with the same shades of green chalk paint but making sure the overlapping green was different to the green underneath to make more of a contrast. Dry the paint thoroughly then stamp with black archival ink using the beautifully detailed iCraft rubber stamps called Large Script and Distressed Grid. 


I then used a sheet of mixed media cardstock and painted half in shades of yellow and orange and the other half in shades of pink and purple. Once dry, I used the iCraft Large Flower 1 and iCraft Large flower 2 rubber stamps with versa mark and glitter embossing powder in gold and purple. Once heat set, I fussy cut them out and edged them with black ink. I also stamped the iCraft detailed branch with leaves on some vellum, let it dry and then cut out.


Once all my elements were ready, I arranged them around the page and glued them down, some with foam tape underneath to create height and some straight to the page. I also snipped into some of the petals on the flowers so they separated.

I then cut out a sentiment sticker I had in my stash and glued it onto my flowers. I finished it off with some glass domes white gesso spatters and some white gel pen highlights.

I hope this inspires you to try these beautiful products and techniques.

Listed below are the iCraft Products I used:

iCraft Heavy White Gesso

iCraft Chalk Paints in the following shades:

Flowers: Campfire , Bongo Jazz and Sunny yellow, Caprice, Grape Vineyard, Flamboyant

Background: Cypress green, Deep Waters, Summer Fern, Golden Green