Wednesday 22 September 2021

Love By Kerrie Barnes

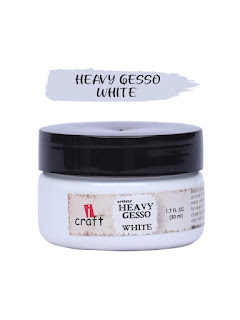
 Hi and welcome to the iCraft blog.  For this project I used a canvas and an embroidery hoop to showcase my beautiful niece Violet.  I began by painting the canvas with iCraft Heavy Gesso Black, and layered it with torn pieces of the iCraft Bloom De Fleur paper collection.  I then used iCraft Heavy Gesso White on the hoop as a base coat, followed by iCraft Palm Tree Chalk Paint.  It was a little dark, so I painted some white gesso over the top to mute the green.


My niece is very girly and sweet, so I wanted to highlight her with plenty of flowers, but also add a bit of a grungy look as well.  I went back to the canvas and inked the edges of all the paper with black ink to tone down the back ground a little.  Then I chose a piece of corresponding Bloom De Fleur paper and glued it to the back of the hoop.  iCraft Frame i037 was painted in white gesso, then Palm Tree chalk paint, with a little more white gesso on top to tone down the green.


I used double sided tape to mount the picture of my niece, and stuck some muslin down under the iCraft frame.  Then I adhered the frame inside the hoop, and added fussy cut flowers from the paper collection.


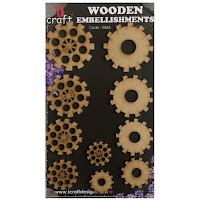
Using iCraft Heavy Gesso Black, I painted all the iCraft wooden embellishments and waited for them to dry.  I then layered the embellishments with various flowers and more fussy cut pieces.  I used a die to cut a bow and glued it to the top of the hoop, then glued the hoop to the canvas.  I decided to use black ink on the frame, hoop and fussy cut flowers to highlight edges.  The canvas I bought came with a tripod stand, so I painted it with iCraft Heavy Gesso Black, then rubbed on some iCraft wax.  Then I decided to add iCraft wax to all the black embellishments and frame.  


I hope you enjoyed my project.  Until next time, take care and thank you for stopping by.  These products and many more can be found at tinamarie.com.au.  Kerrie xx

iCraft Bloom De Fleur Paper Collection


Mulberry Fillers-Baby Pink

Mulberry Fillers-Cream

Mulberry Fillers-Purple

WE 071

i081

i166

i037

i513


iCraft Mulberry Rose - Shaded Pink


iCraft Mulberry Roses - Pink


iCraft - Cuteness, Love and Flowers.


The beautiful iCraft paper range called Country Garden was perfect for a layout with lots of fussy cutting. 

Prepare  your wooden embellishments with chalk paint. For the honey comb pieces paint with Minnesota Pines mixed with some white gesso. This creates a softer green to compliment the back ground colours.  Paint the words and heart arrow with the full colour of  Minnesota Pine. Add some lightness, use watered down white gesso to take down the solid colour . Paint the leafy wooden pieces, with Deep Waters. Once dry, dab watered down white gesso to add depth to the painted surface. 

Assemble your layout - mat your photo on 3 pieces of complimenting papers and use foam tape between the layers. I always align slightly off centre which adds a feature to the layout. I started with a base paper that also featured flowers and added in a range of fussy cut flowers of various sizes to sweep the blooms from the top left around the photo and bottom right up on the left hand size. Arrange your flowers on the layout adding some foam tape to raise the top ones to add depth. Once adhered, slide the wooden embellishments under the floral arrangement making sure that is is off centre. To finish off, I added some watered down Deep Waters chalk paint under some of the flowers to add depth to the background. 

I have added some close up photos of the layout and some of the products used. 

For a full range of iCraft products, please follow the link bellow:

https://tinamarie.com.au


  https://tinamarie.com.au/product/wooden-embellishment-i331/


Saturday 18 September 2021

Working from Nine to Wine! Serving Board by Deb Stephens


Hanging Serving Board

Start by giving one side of a kitchen board a light sand and then applying iCraft White Gesso. Then layer up with iCraft chalk Autumn Valley paint in some sections and Cypress green in others. 

While the paint is still wet, rub some of it away with a baby wipe lightly so that parts of the wood were exposed again.  

Dry the paint. Use stencil 8579 and apply iCraft chalk paint in Smokey Claret with a sponge to get the rustic brick effect and then dry. 

Apply iCraft Gilding Glue with a texture tool around the board and then gently apply Gliding foil and leave to dry. Remove excess with some fine steel wool so it blends in more with the scratchy paint. 

Apply Irish Acres and Iris Impact through a grape vine stencil in the same way around the board and dry. 

Highlight some section with colour pencil in similar shades to make them stand out more. Trim out the elements you want from the Insta transfer sheet 5014. Peel off the clear protective sheet and apply face down around the board.

Use a paint brush and water to wet the backing paper until it is thoroughly soaked. Gently remove the backing paper so that transfer stays on the board. Let that dry well. 

Apply at least 2 coats of varnish to seal. Finish with some rustic string to hang. 


Products used are listed below:

iCraft Gliding Foil- Silver

Thanks so much for stopping by. 


Tuesday 14 September 2021

Capture The Moment By Kerrie Barnes

 Hello everyone and welcome.  Today I have a vinyl record (thanks Cliff Richard), which I decorated Steampunk style, then added photos of my beautiful Son Daniel.  Firstly, I sanded the record so all media would stick and not flake off.  I then coated the whole thing with a couple of coats of iCraft Heavy Gesso Black.  I chose my iCraft cogs and decided to use the gorgeous iCraft 3D wooden clock embellishment, and coated them all in iCraft Heavy Gesso Black.


I layered areas of texture with iCraft modelling paste and three iCraft layering stencils.  I also added texture sand to iCraft modelling paste and scraped it gently onto the record.  After everything dried, I painted everything with more iCraft Heavy Gesso Black, and once again, waited for it to dry..


Then came time to arrange all of the cogs and the clock, which I stuck down with tacky glue.  I selected various iCraft chalk paints and decanted some onto a palette with some texture sand.  I added more sand to some paint to create a grittier effect.  Then I painted everything and rubbed on some wax to highlight areas.


I added four photos of my Son and placed cogs over them as frames.  The Capture The Memories embellishment was painted with two different waxes, then glued to the record.


I hope you enjoyed my project and I can't wait to share the next one with you.  Until next time, stay safe and well.  Kerrie xxxx.


0365

0360

0356

WE354


WE067


i038


i222


i418


WE0606


i8546

i-8601


i-8605


All products available at https://tinamarie.com.au